 Amplia
Measure Angles in an Image or Photo
Amplia turns any image into an on-screen protractor. Click three points — one arm, the corner, the other arm — and read the angle straight off the picture. No install, no sign-up, and nothing to calibrate first.
- No calibration needed
- Degrees, radians or gradians
- Runs in your browser
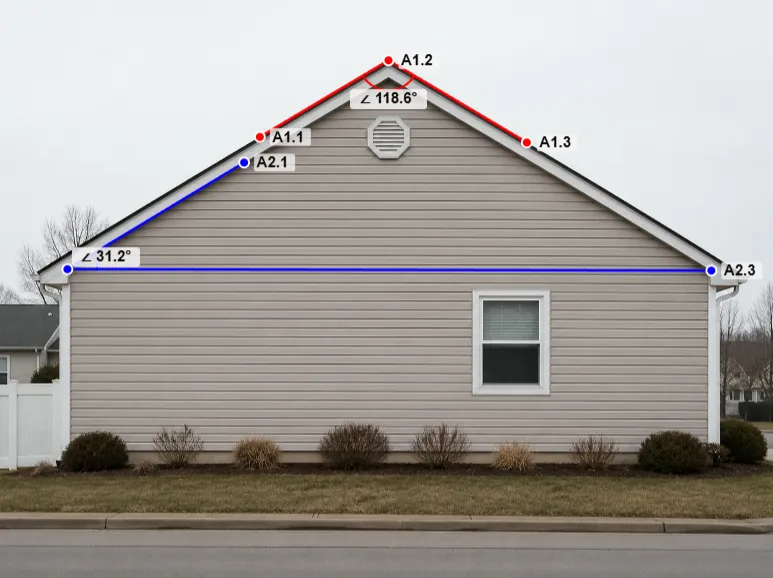
How to measure an angle in an image
Three clicks, with no calibration step in front of them — an angle is a ratio, so it does not care what the picture’s scale is.
Open your image
Drop in a photo, a screenshot, a scan or a plan — or start from the built-in sample image. Without an account everything happens in your browser and the file never leaves your device.
Click the three points of the angle
Pick the Angle tool, then click once along the first arm, once on the corner itself, and once along the second arm. On desktop a dashed preview arm and a live value follow your cursor between the second and third clicks.
Read the value, then refine it
The angle appears in a pill on the bisector, written ∠ 94°. Drag any of the three points and it updates instantly, and the shape’s details list the reflex angle alongside it.
Corner angles from the polygon and polyline tools work the same way, with one extra step in front: those tools also report length, perimeter and area, so they ask you to set the scale first.
Three ways to read an angle
The Angle tool is the direct route. Polylines and polygons hand you every corner at once, as a by-product of measuring lengths and areas.
| Property | Angle tool | Polyline | Polygon |
|---|---|---|---|
| What it measures | The angle between three points you place: one arm, the corner, the other arm. | The angle at every bend along a multi-segment path. | The interior angle at every corner of a closed shape. |
| Value range | 0–180° for the interior angle, plus the matching 180–360° reflex angle. | 0–180°. A perfectly straight run reads 180°, not 0°. | 0–360°. A corner that folds inwards correctly reads over 180°. |
| Calibration first? | No. Angles do not depend on scale, so the tool is live as soon as the image is. | Yes — this tool also reports segment and total length. | Yes — this tool also reports perimeter and area. |
| Label on the canvas | Its own pill, written ∠ 94°, sitting on the bisector. Always visible. | A second row on the point label. Switch on Angle labels in the Layers panel. | A second row on the point label. Switch on Angle labels in the Layers panel. |
| Reach for it when | You want one angle, fast. | You are following a slope, a route or a run of bends. | You need every corner of a plot, a room or an outline at once. |
∠ is the Angle tool’s own marker — polyline and polygon corner values ride along on the point label instead. All three obey the same angle unit and the same rounding setting.
Degrees, radians and gradians
The angle unit is its own display setting, independent of the length units — so you can measure in feet and still read angles in gradians. Switch it under Settings → General → Angle unit.
Degrees
The default, and the unit most trades speak in. A full turn is 360°. Amplia shows one decimal place unless you pin it to something fixed.
Radians
The math and CAD unit, where a full turn is 2π ≈ 6.283. A single radian covers a lot of ground, so this one is shown to three decimals by default.
Gradians
The surveyor’s unit. A right angle is exactly 100 gon and a full turn is 400, which makes quarter turns land on round numbers.
The same angle in all three units
| Degrees | Radians | Gradians |
|---|---|---|
| 15° | 0.262 rad(π/12) | 16.7 gon |
| 30° | 0.524 rad(π/6) | 33.3 gon |
| 45° | 0.785 rad(π/4) | 50.0 gon |
| 60° | 1.047 rad(π/3) | 66.7 gon |
| 90° | 1.571 rad(π/2) | 100.0 gon |
| 120° | 2.094 rad(2π/3) | 133.3 gon |
| 135° | 2.356 rad(3π/4) | 150.0 gon |
| 180° | 3.142 rad(π) | 200.0 gon |
| 360° | 6.283 rad(2π) | 400.0 gon |
Values are written here exactly the way Amplia writes them on Auto rounding — one decimal for degrees and gradians, three for radians. Pin any of them to a fixed 0–3 decimals under Settings → Rounding.
Read a roof pitch straight off a photo
Roofers talk in rise over run — a 6/12 roof climbs six units for every twelve it runs. A protractor gives you degrees. Measure the angle where the rake meets the horizontal, then read the pitch across.
Photograph the gable end square-on from ground level. Put the Angle tool’s first point along the eave, the second on the corner where the rake meets it, and the third up along the rake. The value on the arc is the pitch angle.
Because angles need no calibration, this works on a photo somebody sent you, a listing photo, or a drone frame. You never have to know a single real dimension in the picture.
angle = arctan(rise ÷ 12) · grade = rise ÷ 12 × 100
| Pitch | Angle | Grade |
|---|---|---|
| 1/12 | 4.8° | 8.3% |
| 2/12 | 9.5° | 16.7% |
| 3/12 | 14.0° | 25.0% |
| 4/12 | 18.4° | 33.3% |
| 5/12 | 22.6° | 41.7% |
| 6/12 | 26.6° | 50.0% |
| Pitch | Angle | Grade |
|---|---|---|
| 7/12 | 30.3° | 58.3% |
| 8/12 | 33.7° | 66.7% |
| 9/12 | 36.9° | 75.0% |
| 10/12 | 39.8° | 83.3% |
| 11/12 | 42.5° | 91.7% |
| 12/12 | 45.0° | 100.0% |
Shot square-on, an elevation photo is close enough to a flat plane that the angle is trustworthy. Shot from the side or from below, the same roof will read several degrees off — the next section covers why.
When an angle from a photo is trustworthy
Angles are immune to the one error that dominates distance and area work — getting the scale wrong. They are exposed to a different one entirely.
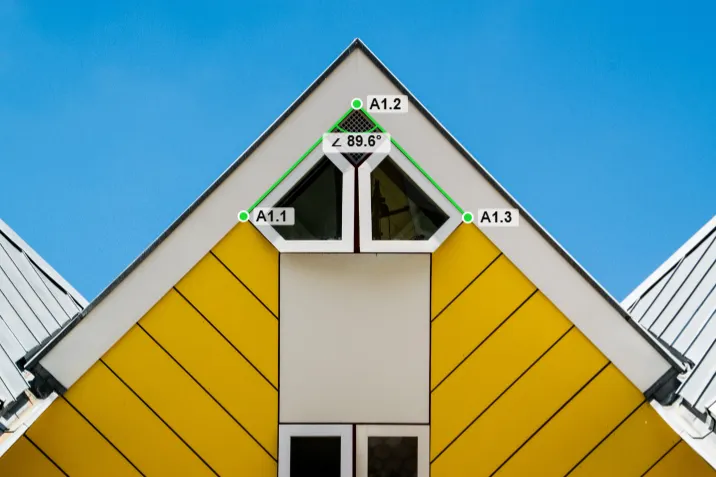
Angles you can trust
- The camera was square-on to the surface — lens pointing straight at the plane the angle sits on.
- Scans, elevations, floor plans and technical drawings, which are already flat by construction.
- Straight-down drone and satellite frames, for angles between things lying on the ground.
- Both arms of the angle sit on the same flat surface.
- Screenshots kept at their original proportions, never squashed to fit a slide.
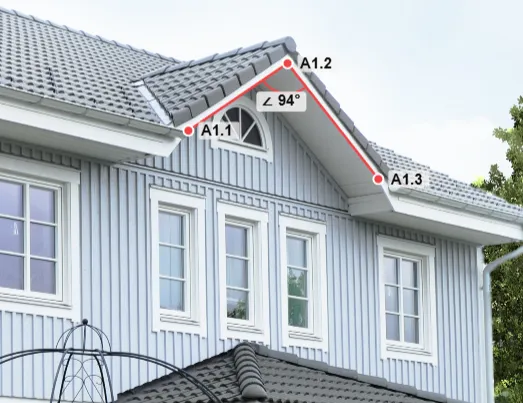
Angles that will mislead you
- Oblique views. A true 90° corner shot from the side can read 104°, and nothing in the picture warns you.
- Ultra-wide and fisheye phone lenses, which bow straight lines near the edges of the frame.
- Arms that span two different surfaces, or two different distances from the camera.
- Curved surfaces, where the answer changes depending on where you put the arms.
- Images stretched unevenly — uniform scaling is harmless, uneven scaling is not.
Angles need no scale, but they do need geometry. Resizing a photo changes nothing about its angles; tilting the camera changes everything. If you cannot get directly in front of what you are measuring, step further back and zoom in rather than moving off-axis — a longer lens flattens perspective. There is a proper fix: Perspective calibration — a PRO feature on saved projects — maps a tilted plane from four points on a rectangle whose real width and height you know, and corrects angles along with everything else. Without it, reshooting square-on is the reliable answer.
What people measure angles for
Every one of these starts the same way: an image somebody already has, and three clicks.
Roof pitch
Measure the rake against the horizontal on a square-on elevation or a drone frame, then convert to rise over run with the table above.
Miter and joinery angles
Photograph a frame corner or a workshop drawing flat-on and read the joint angle before you cut, not after.
Plot and parcel corners
Site plans and plat maps are already flat, so corner angles come straight off the drawing with no correction.
Ramps, stairs and slopes
Shoot a stair or a ramp side-on and check the slope against the one the spec called for.
Parts and brackets
The bend on a bracket, a chamfer on a machined part, an angle called out on a scanned drawing you no longer have the file for.
Teaching geometry
Drop in a map, a diagram or a photo of a real structure and let students measure the angles themselves instead of reading them off a page.
Frequently asked questions
?Do I need to calibrate the image before measuring an angle?
Not for the Angle tool. An angle is a ratio, so it does not change with scale — the tool is available the moment your image loads, and you never have to enter a real dimension. Corner angles from the polygon and polyline tools are different: those tools also report length, perimeter and area, so they ask you to set the scale first.
?Can I measure an angle without drawing a whole shape?
Yes — that is exactly what the Angle tool is for. Three clicks give you one angle and nothing else: no polygon to close, no path to trace, no area or perimeter you did not ask for. Polygons and polylines are there for when you do want every corner at once.
?Can I use it as an online protractor?
Yes, for anything you can get into a picture. Photograph or screenshot the object, drawing or screen, open the image and click three points — Amplia reads the angle off the picture like a protractor laid on it. It is not a transparent overlay for a physical object held against the screen; for that, take a square-on photo and measure that instead.
?Which angle units can I use?
Degrees (°), radians (rad) and gradians (gon), with degrees as the default. The angle unit is its own setting under Settings → General, independent of the length units, so a project measured in feet can still show its angles in gradians.
?How accurate is an angle measured from a photo?
As accurate as the photo is flat. If the camera was square-on to the surface the angle sits on — an elevation, a scan, a plan, a straight-down drone frame — the angle you read is essentially the real one. Shoot the same corner from an oblique position and perspective will skew it, sometimes by ten degrees or more, with no visible clue in the image.
?Can I measure a reflex angle, over 180°?
Yes. The Angle tool reports both numbers: the interior angle between 0° and 180° that you see on the canvas, and the matching reflex angle between 180° and 360° in the shape’s details. Polygons go further — a corner that folds inwards is reported above 180° automatically.
?Can I measure several angles on the same image?
Yes. Place as many separate angles as you need, and drag any point of any of them to adjust. Draw a polygon or a polyline instead and every corner and every bend gets its own value — switch on Angle labels in the Layers panel to show those on the canvas.
?How do I get a roof pitch from a photo?
Photograph the gable square-on, measure the angle where the rake meets the horizontal, then read the pitch off the table on this page: 18.4° is a 4/12 roof, 26.6° is 6/12, and 45° is 12/12. Because no calibration is involved, this works on a photo you did not take yourself.
?Is my photo uploaded anywhere?
Not when you measure as a guest. Without an account the image is opened and measured entirely in your browser and never leaves your device. Saving a project to an account is a separate, deliberate step.
?Do I need an account or an install?
Neither. It runs in the browser on desktop, tablet and phone, with nothing to download. Measuring angles is free, and there is a built-in sample image if you want to try the tool before hunting for a photo of your own.
Measure your first angle now
Open the tool, drop in a photo — or use the sample image that is already waiting there — and click three points. No account, no install, nothing to calibrate.